Most tile problems start in the layer nobody ever sees. A slab that is out of flat by more than 1/8 inch over ten feet is outside the tolerance for 12 by 24 inch porcelain, and that is where lippage at the tile edges, hollow spots under the corners and cracked grout lines usually start. Grinding the high spots and pouring self-leveling underlayment before a single tile goes down costs a fraction of pulling the floor back up later.
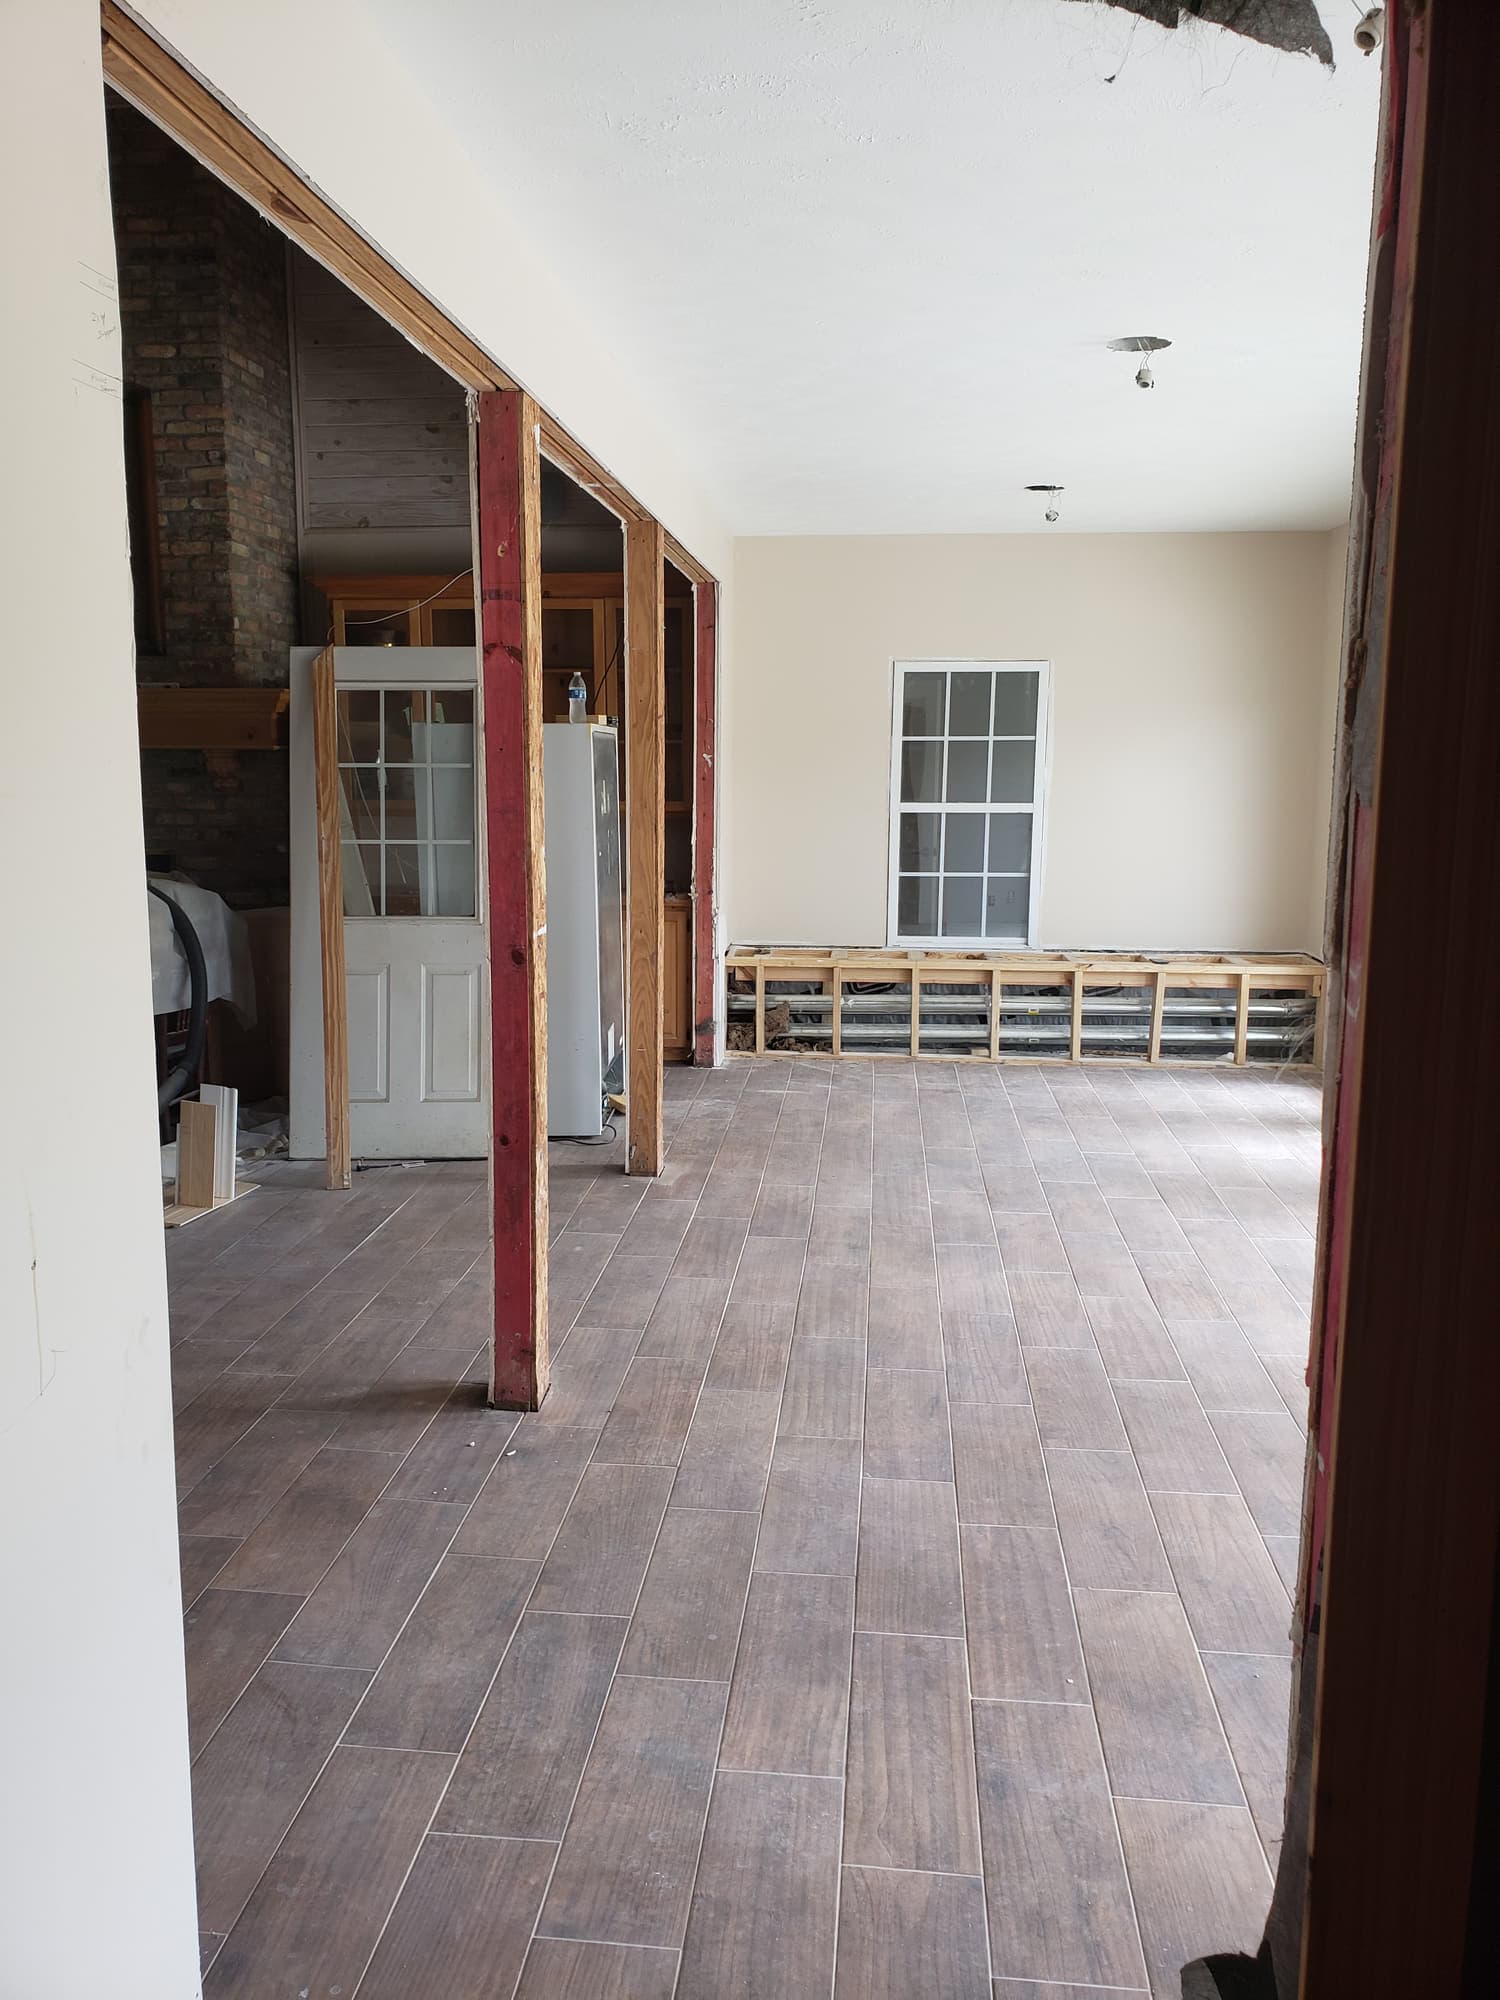
Wood-look porcelain plank run continuously through a widened opening. Planks 15 inches and longer are set at a one-third offset, not a half-tile brick bond, because tile warpage shows up worst at the middle of the neighboring plank.
Tile is part of nearly every remodel Top Rank Construction takes on rather than a stand-alone trade. Wood-look porcelain plank goes down as part of flooring installation, shower pans and tub surrounds get tiled during bathroom remodeling, and backsplashes are set once the cabinets and counters are in during kitchen remodeling. When a wall comes out for an open plan, the floor tile has to run through the old wall line without a seam, which means the layout gets planned before demolition, not after.
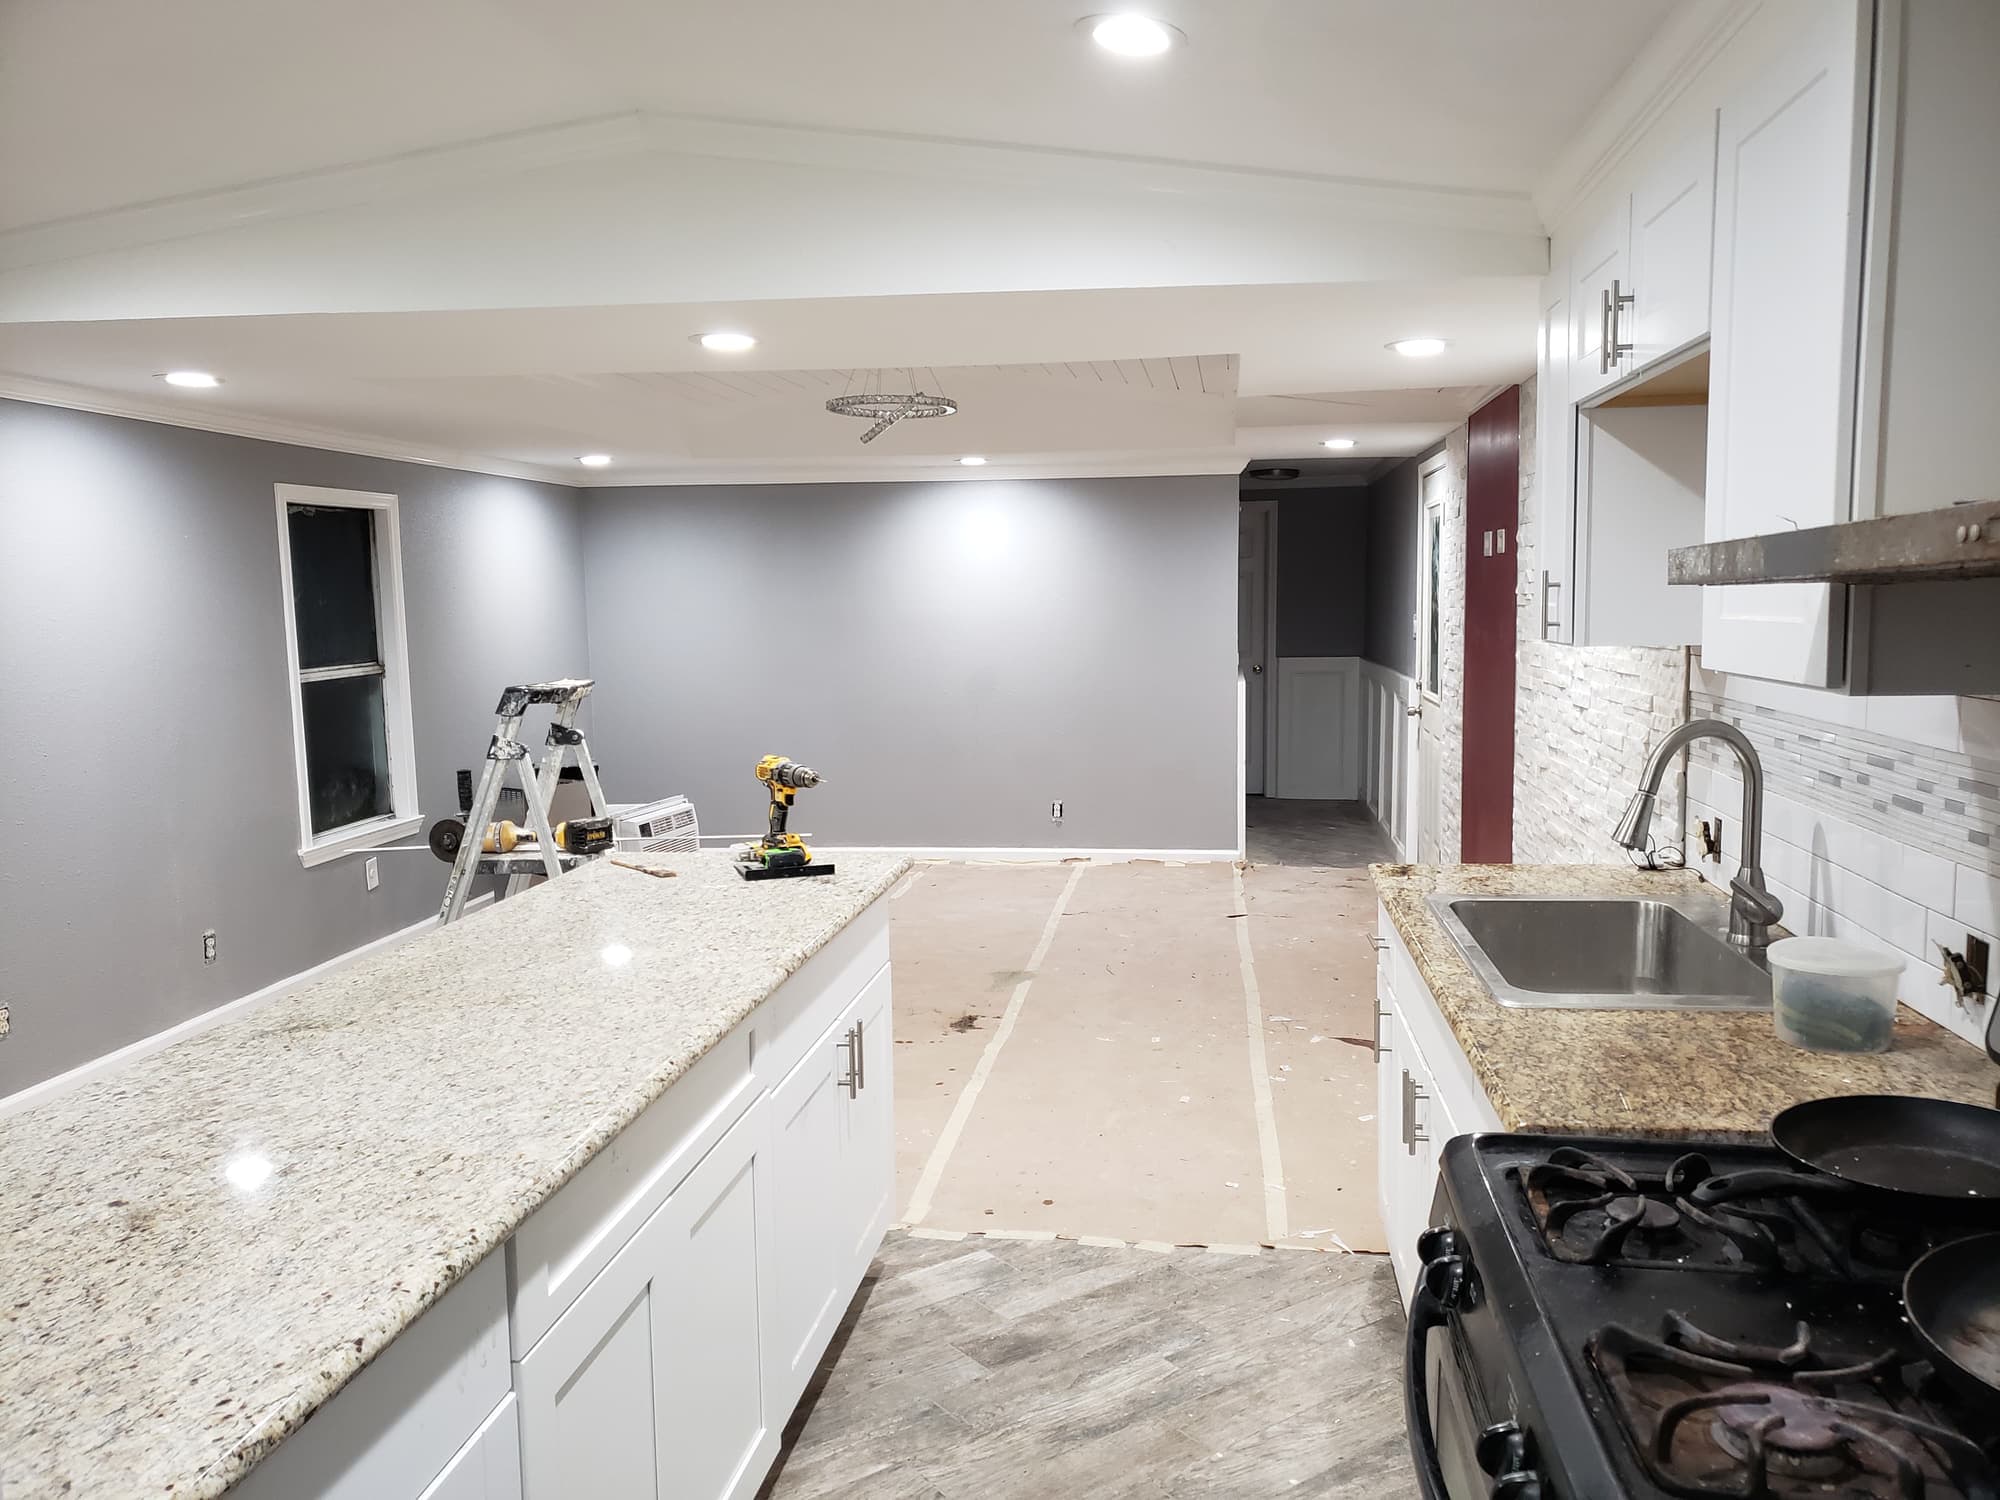
Stacked-stone backsplash set on drywall after the cabinets and granite were in place. Wall tile goes up last so the first course can be scribed to the finished counter instead of guessing at it.
What follows is how the work is actually sequenced, what the substrate has to do before tile touches it, and where Houston's clay soil and humidity change the details. If you are reading this while getting bids, ask every contractor you talk to how they handle flatness tolerance, mortar coverage and movement joints.
What the job includes
Scope, in the order it happens
01
Substrate assessment and flatness correction
Before pricing anything, the floor gets checked with a 10 foot straightedge in several directions. High spots on a slab get ground down; low areas get primed and filled with self-leveling underlayment. Over a wood-framed floor, the joist spacing and span are checked for deflection, and 1/2 inch cement board goes over a 3/4 inch plywood subfloor. Large-format tile is far less forgiving of a wavy floor than 12 inch squares, so the tolerance tightens as the tile gets bigger.
02
Crack isolation over concrete slabs
Tile bonded directly to a Houston slab has nowhere to go when the slab moves. An uncoupling membrane or a liquid crack-isolation membrane lets the slab shift a small amount underneath without transmitting that movement into the tile and grout. The membrane is not a substitute for a stable foundation, but it absorbs the seasonal hairline movement that cracks an otherwise sound floor.
03
Shower and wet-area waterproofing
Cement board is a substrate, not a waterproof layer. Showers and tub surrounds get a bonded sheet membrane or a two-coat liquid membrane over the full wall height, with corners, seams and the drain flange banded. Pans are pre-sloped toward the drain, and a pan is flood-tested and held before any tile goes on it. Skipping the flood test is how a leak gets buried behind finished tile.
04
Layout and dry lay
Control lines come off the most visible reference in the room, usually the cabinet run, the tub or the longest sight line, not off a wall that may not be square. The dry lay is where sliver cuts get pushed out of doorways, plank offsets get set, backsplash courses get balanced under the upper cabinets, and cuts at outlets and switch boxes get planned. Ten minutes of chalk lines prevents a half-inch sliver against the range wall.
05
Setting floor tile
Mortar is chosen for the tile and the substrate: a medium-bed or large-and-heavy-tile mortar under long planks, unmodified thinset where a membrane manufacturer calls for it. Tile is back-buttered where the pattern on the back is deep, set with the correct notch trowel, and tiles are periodically pulled and inspected to confirm mortar coverage. Leveling clips hold adjacent edges flush while the mortar sets on large-format tile.
06
Backsplash and wall tile
Wall tile goes on after cabinets, counters and paint prep are done. The first course is either scribed to the counter or run off a level ledger when there is no counter to follow, because a backsplash that follows an out-of-level counter will show it at the upper cabinets. Any drywall repairs from cabinet removal or an old backsplash tear-out are patched, taped and flat before tile, which is the same drywall work described on our drywall page.
07
Grout, caulk, edges and transitions
Grout is matched to the joint width and the location, sealant replaces grout at every inside corner and change of plane, and exposed tile edges get a metal or PVC profile or a mitred edge rather than a raw cut. Thresholds and transitions to wood, carpet or an adjacent room are set flush so nothing catches a toe. Baseboard and shoe are reinstalled or replaced as part of the trim carpentry that closes the room out.
Materials and specification
What it is actually built from
Specifications vary with the house and what we find once it is open. This is the standard we work to unless there is a reason not to — and if there is, we will tell you what it is before we change it.
New header framed across the widened opening; wood-look porcelain already down.
Floor flatness tolerance
1/4 in. in 10 ft for tile under 15 in.; 1/8 in. in 10 ft for tile 15 in. and longer, corrected by grinding high spots and pouring self-leveling underlayment over primer
Backer board
1/2 in. cement board over a 3/4 in. plywood subfloor in wet areas; 1/4 in. cement board where door clearance or a transition height is tight
Crack isolation
Approx. 1/8 in. polyethylene uncoupling membrane bonded to the slab under floor tile, or a liquid crack-isolation membrane on prepared concrete
Shower waterproofing
Bonded sheet membrane or two-coat liquid membrane to full wall height, seams and inside corners banded, pan pre-sloped about 1/4 in. per foot to the drain and flood-tested before tile
Setting mortar
Modified thinset for most porcelain and ceramic; large-and-heavy-tile (medium bed) mortar under planks and slabs 15 in. and longer; unmodified thinset where the membrane manufacturer requires it
Trowel and coverage
1/2 x 1/2 in. square notch for large-format floors, 1/4 x 3/8 in. for standard floor tile, 1/4 x 1/4 in. square or U-notch for mosaic and subway backsplash; 80 percent mortar coverage minimum in dry areas, 95 percent in showers and exterior work
Grout
Unsanded for joints under 1/8 in., sanded at 1/8 in. and wider, high-performance cement or epoxy grout in showers and behind cooktops; 100 percent silicone, not grout, at inside corners and at tub, counter and pan junctions
Joints, offset and edges
1/16 in. minimum joint on rectified porcelain, 1/8 in. typical on pressed subway, maximum one-third offset on planks 15 in. and longer, soft joints at the perimeter and at changes of plane, metal or PVC edge profile at exposed tile edges
Local conditions
What changes because this is Houston
Gulf Coast clay, humidity and a storm season are not background detail. They decide how this work gets built.
Expansive clay moves the slab under your floor
Greater Houston sits on Gulf Coastal Plain clay that swells in wet months and shrinks in drought. That seasonal movement is the reason a tile floor cracks in a long straight line across a room while the tiles on either side are still bonded tight. An uncoupling membrane, correctly placed movement joints, and a soft perimeter joint hidden behind the baseboard absorb most of it. If a slab is actively moving beyond that, the honest answer is that the foundation gets addressed first and the tile second.
Post-tension slabs limit what can be cut
Many Houston-area homes sit on post-tension slabs with steel cables under tension inside the concrete. You cannot core or saw-cut that slab to relocate a shower drain, lower a curbless shower entry, or add a floor drain without locating the cables first. This is checked early because it decides whether a curbless shower is realistic in a given bathroom or whether the pan stays where the existing drain already is.
Humidity stretches cure times
Long humid summers slow the drying of mortar and grout, and a slab or a fresh concrete patch holds moisture longer than most homeowners expect. Air conditioning stays on and the room stays ventilated during the job, and a moisture reading on the slab is worth taking before bonding a membrane to it. Rushing a shower back into service before the grout and sealant have cured is a common way to stain new grout or break a fresh silicone joint.
Storm season and water that gets under tile
Tropical weather from June through November, plus the everyday failure of old caulk at a tub or shower, sends water into places that do not dry out. Once cement board is saturated or a plywood subfloor has swelled, the tile over it will loosen no matter how well it was set, so the wet material comes out rather than getting tiled over. Top Rank Construction takes emergency calls around the clock for that kind of water damage, with regular scheduling Monday through Friday, 8 AM to 5 PM.
Permits, deed restrictions and HOA rules
Replacing tile in an existing kitchen or bath is generally a finish job, but the work around it may not be. Relocating plumbing or electrical, or taking out a bearing wall so a floor can run through, is permitted through the Houston Permitting Center inside city limits, through Harris County in unincorporated areas, and through the individual office in Fort Bend, Montgomery, Brazoria, Galveston or Waller County or an incorporated suburb. Houston has no conventional zoning ordinance, so what you can build or change outside is largely governed by deed restrictions and HOA covenants, while structural or covered exterior work still goes through the applicable permit office. Both get checked before the work is scheduled.
How it runs
From the first call to the last walkthrough
1
Walkthrough and measurement
A visit to the house to measure the rooms, run a straightedge over the floor, look at what is under the existing finish, and check where the drains and any post-tension cable concerns sit. Tile selections you have already made get reviewed for size, thickness and whether the material is rectified, because those change the substrate prep. Estimates are free.
2
Written scope and material takeoff
You get a scope that names the substrate prep, the membrane, the mortar type, the grout and the edge treatment, not just a square-foot number. Quantities include overage, generally about 10 percent for a straight lay and closer to 15 percent for diagonal or herringbone patterns and long plank cuts. Tile is ordered in one shade lot where possible, and a spare box is set aside for future repairs.
3
Demolition, protection and haul-off
Floors and doorways outside the work area are protected, and dust is contained at the openings. Old tile and the thinset bed under it come up to bare slab or bare subfloor, and any soft, delaminated or water-damaged material gets removed rather than covered. Debris is hauled off rather than left in the driveway.
4
Substrate prep and waterproofing
The prep identified at the walkthrough gets executed: grinding, primer, underlayment, then cement board or uncoupling membrane. In showers the membrane goes on with banded corners and seams, and the pan holds water for its flood test before any tile is set. This is the stage that gets photographed, because once tile is on you cannot see any of it.
5
Layout, setting and cutting
Control lines are snapped, a dry lay confirms where cuts land, and tile is set with the correct trowel and back-buttered where required. Wet-saw cutting is done outside, and cuts at outlets, jambs and transitions are made to fit rather than covered with excess caulk. Coverage is checked by pulling a set tile periodically through the day.
6
Grout, sealant and final walkthrough
Grout goes in after the mortar has cured, joints are cleaned and haze removed, then silicone replaces grout at every inside corner and at tub, counter and pan junctions. We walk the finished floor with a light held at a low raking angle, which is the only reliable way to see lippage and hollow spots, and go over cure times and cleaning before the room is put back into use.
New header framed across the widened opening; wood-look porcelain already down.
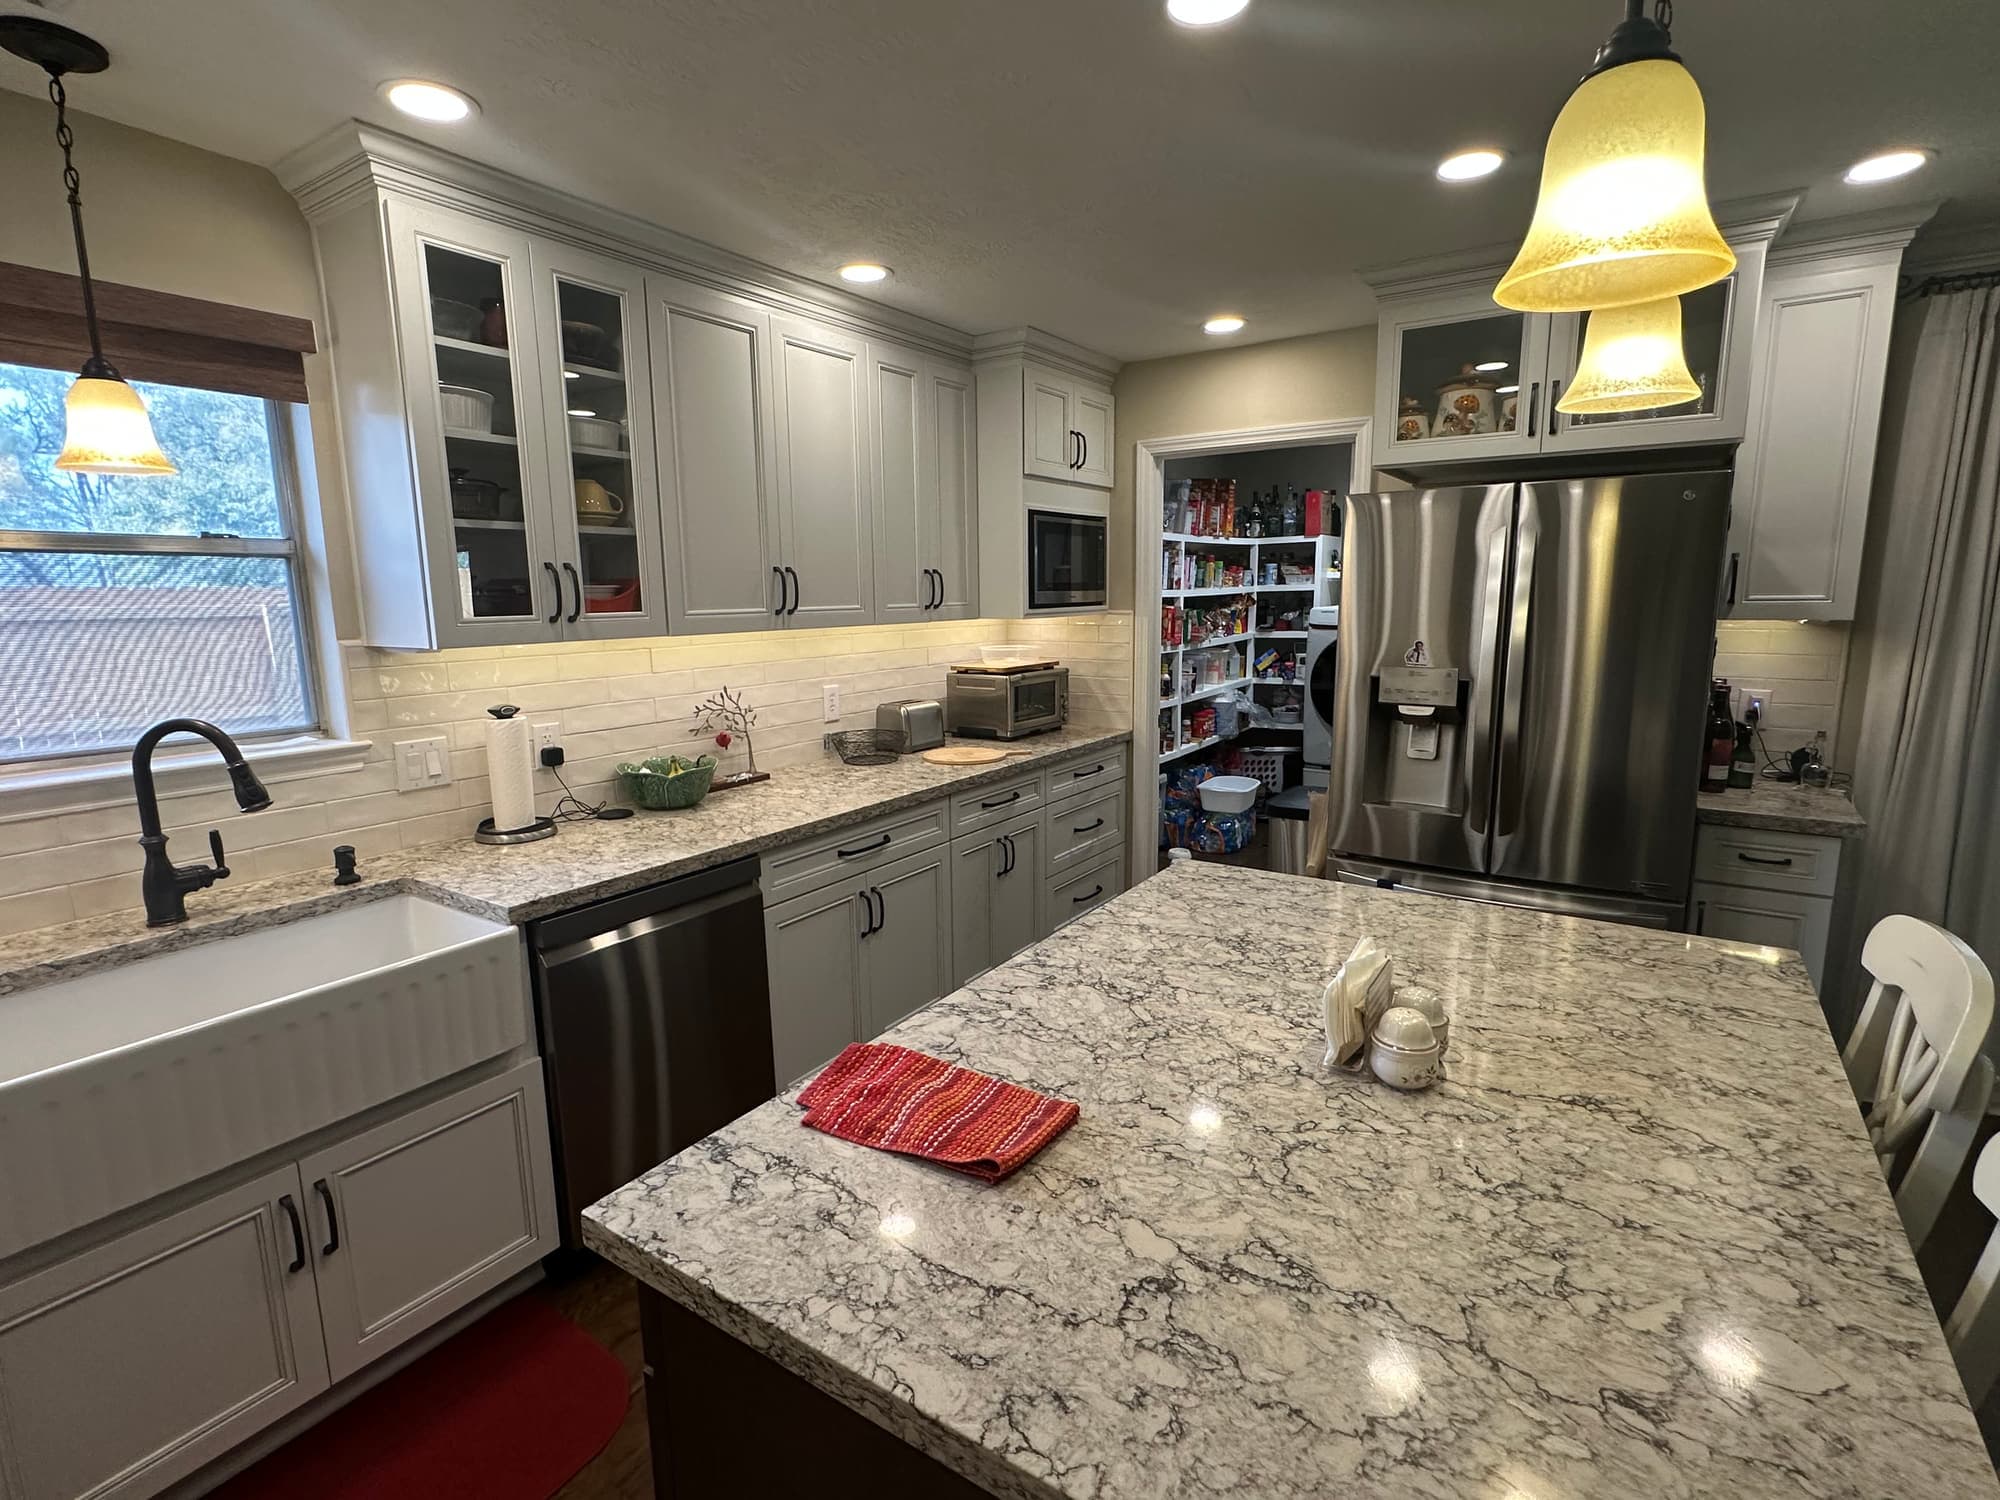
The finished kitchen: quartz island, apron-front sink, full-height subway backsplash and under-cabinet lighting.
Questions
Tile Installation, answered
Can you tile over my existing tile floor?
Sometimes. The existing tile has to be solidly bonded with no hollow-sounding pieces, flat within tolerance, and the added height of roughly 1/2 inch has to work with door clearances, appliance heights and transitions to adjacent rooms. In a shower or a bathroom floor where waterproofing is part of the job, the old tile comes out so the membrane can bond to a proper substrate. We sound the existing floor with a tap during the walkthrough and tell you which way it goes.
Why did my tile crack in a straight line across the room?
That pattern almost always means the slab moved and the tile was bonded directly to it with nothing in between. Houston's expansive clay drives that movement seasonally, and without an uncoupling membrane and movement joints the tile and grout have to absorb it. Replacing the cracked tiles alone usually buys a year or two at best. The durable repair is to remove the field, install crack isolation and set movement joints, and if the slab is still shifting significantly, address the foundation before new tile goes down.
How long before I can walk on the floor or use the new shower?
Foot traffic on a freshly set floor is generally held off for about 24 hours, and grout goes in after that, with heavy loads and furniture waiting longer. A tiled shower needs the grout to reach full cure per the manufacturer before it gets wet, which is typically several days rather than overnight. Houston humidity slows cement grout drying, so that window can stretch, and we give you the actual dates rather than a rule of thumb.
Does the grout need to be sealed, and how often?
Cement-based grout is porous and should be sealed once it has fully cured, then refreshed periodically depending on traffic and cleaning products. Epoxy and high-performance grouts do not require sealing, which is part of why they are worth the extra cost in showers and behind a cooktop. Sealer is not a fix for the wrong grout in a wet area, and it never belongs in place of silicone at an inside corner.
Do you supply the tile, or do I buy it?
Either works. Plenty of homeowners want to pick the tile themselves, in which case we give you the square footage plus overage and the specifics that matter, such as whether the tile is rectified and what thickness it is, so you order the right amount from a single shade lot. If we supply it, the same information goes in the written scope. Keep the leftover box either way, since matching a discontinued tile years later is often impossible.
What grout joint size should I use, and can I install tile with no grout line?
There is no such thing as a truly zero grout joint. Rectified porcelain can go as tight as about 1/16 inch, while pressed tile such as standard subway usually needs 1/8 inch because the individual pieces vary in size and are slightly warped. A wider joint absorbs that variation and hides it; a joint that is too tight puts every millimeter of difference on display along a long run. For long plank tile, the joint width and a one-third offset work together to keep lippage under control.
Call and talk to someone who has been doing this for 15+ years. We will look at the space, tell you what the work actually involves, and put a number on it — at no cost.