Full kitchen renovations in Houston and surrounding areas, from demo and rough-in through cabinets, counters, tile and trim.
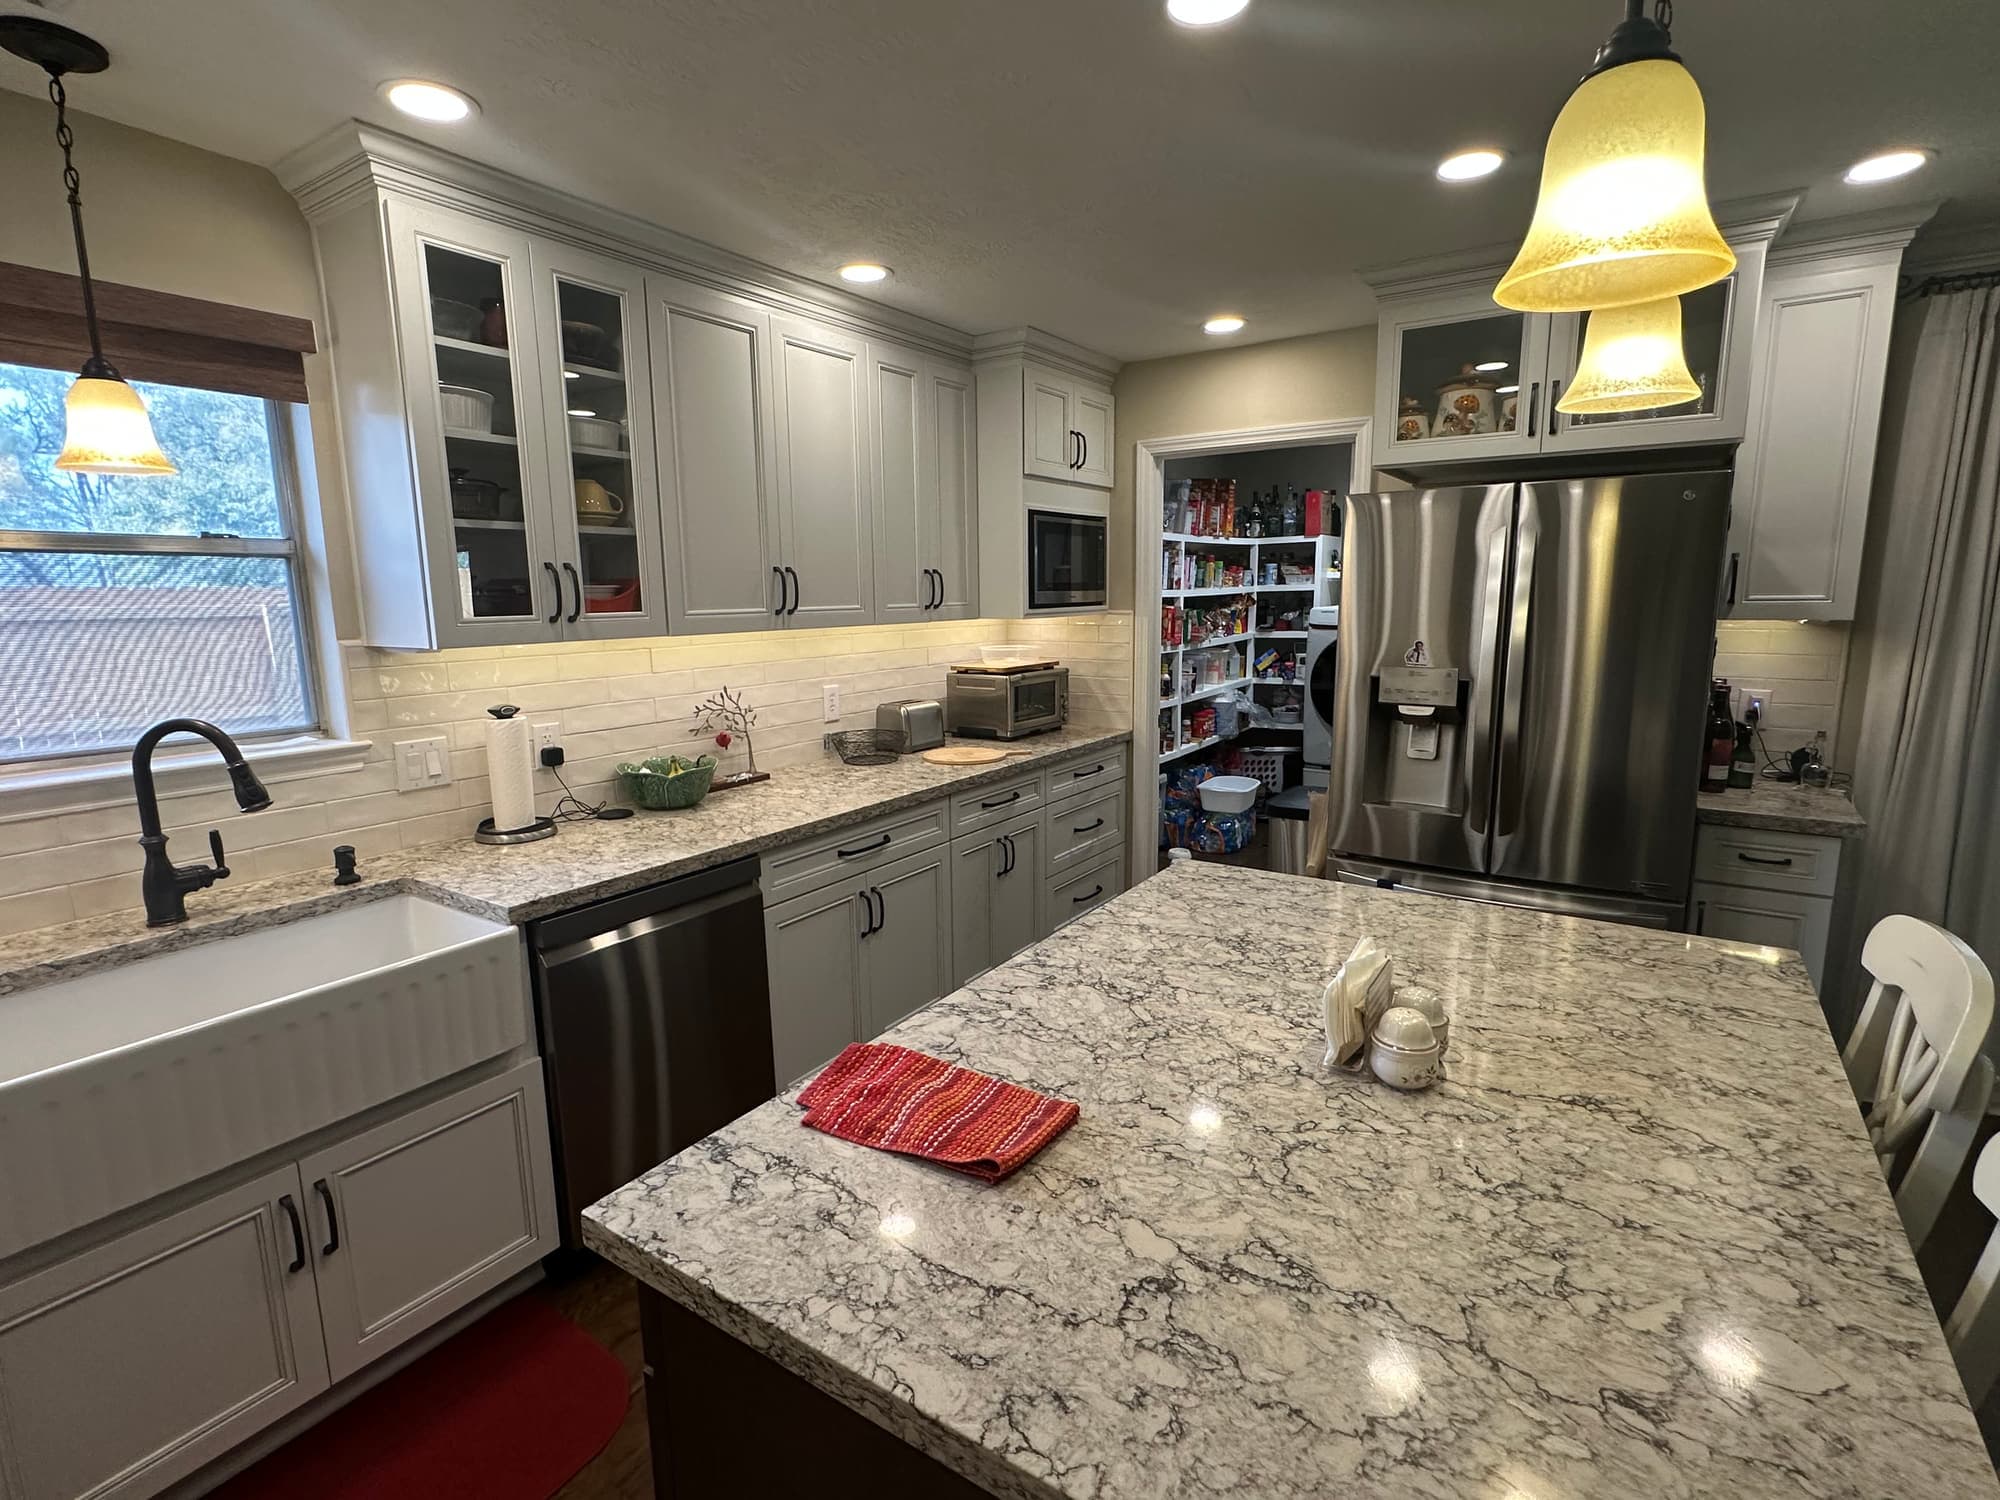
The finished kitchen: quartz island, apron-front sink, full-height subway backsplash and under-cabinet lighting.
In our own words
Full Kitchen Renovation Services
Ready to give your kitchen a fresh, modern look? We handle the complete renovation from start to finish.
We handle:
Cabinets
Everything below is the detail behind that: how the work is sequenced, what it is built from, and what changes in a Houston house.
A kitchen remodel is a sequence problem before it is a design problem. Cabinets cannot be set until the floor is flat and the walls are straight, countertops cannot be templated until the cabinets are set and level, and none of it happens until the plumbing and electrical rough-in is done and, where a permit applies, inspected. Work out of order and you pay for it twice.
Top Rank Construction has more than 15 years of remodeling experience in Houston and surrounding areas, working residential only, and kitchens are a regular part of that work. A full kitchen typically means demolition, soffit and layout changes, new rough-in for the sink and appliances, cabinets, countertops, backsplash, flooring, drywall repair, trim and paint, with each trade sequenced so nothing gets installed twice. Smaller scopes are common too, such as new counters and backsplash over existing boxes, or paint and hardware on cabinets that are still sound.
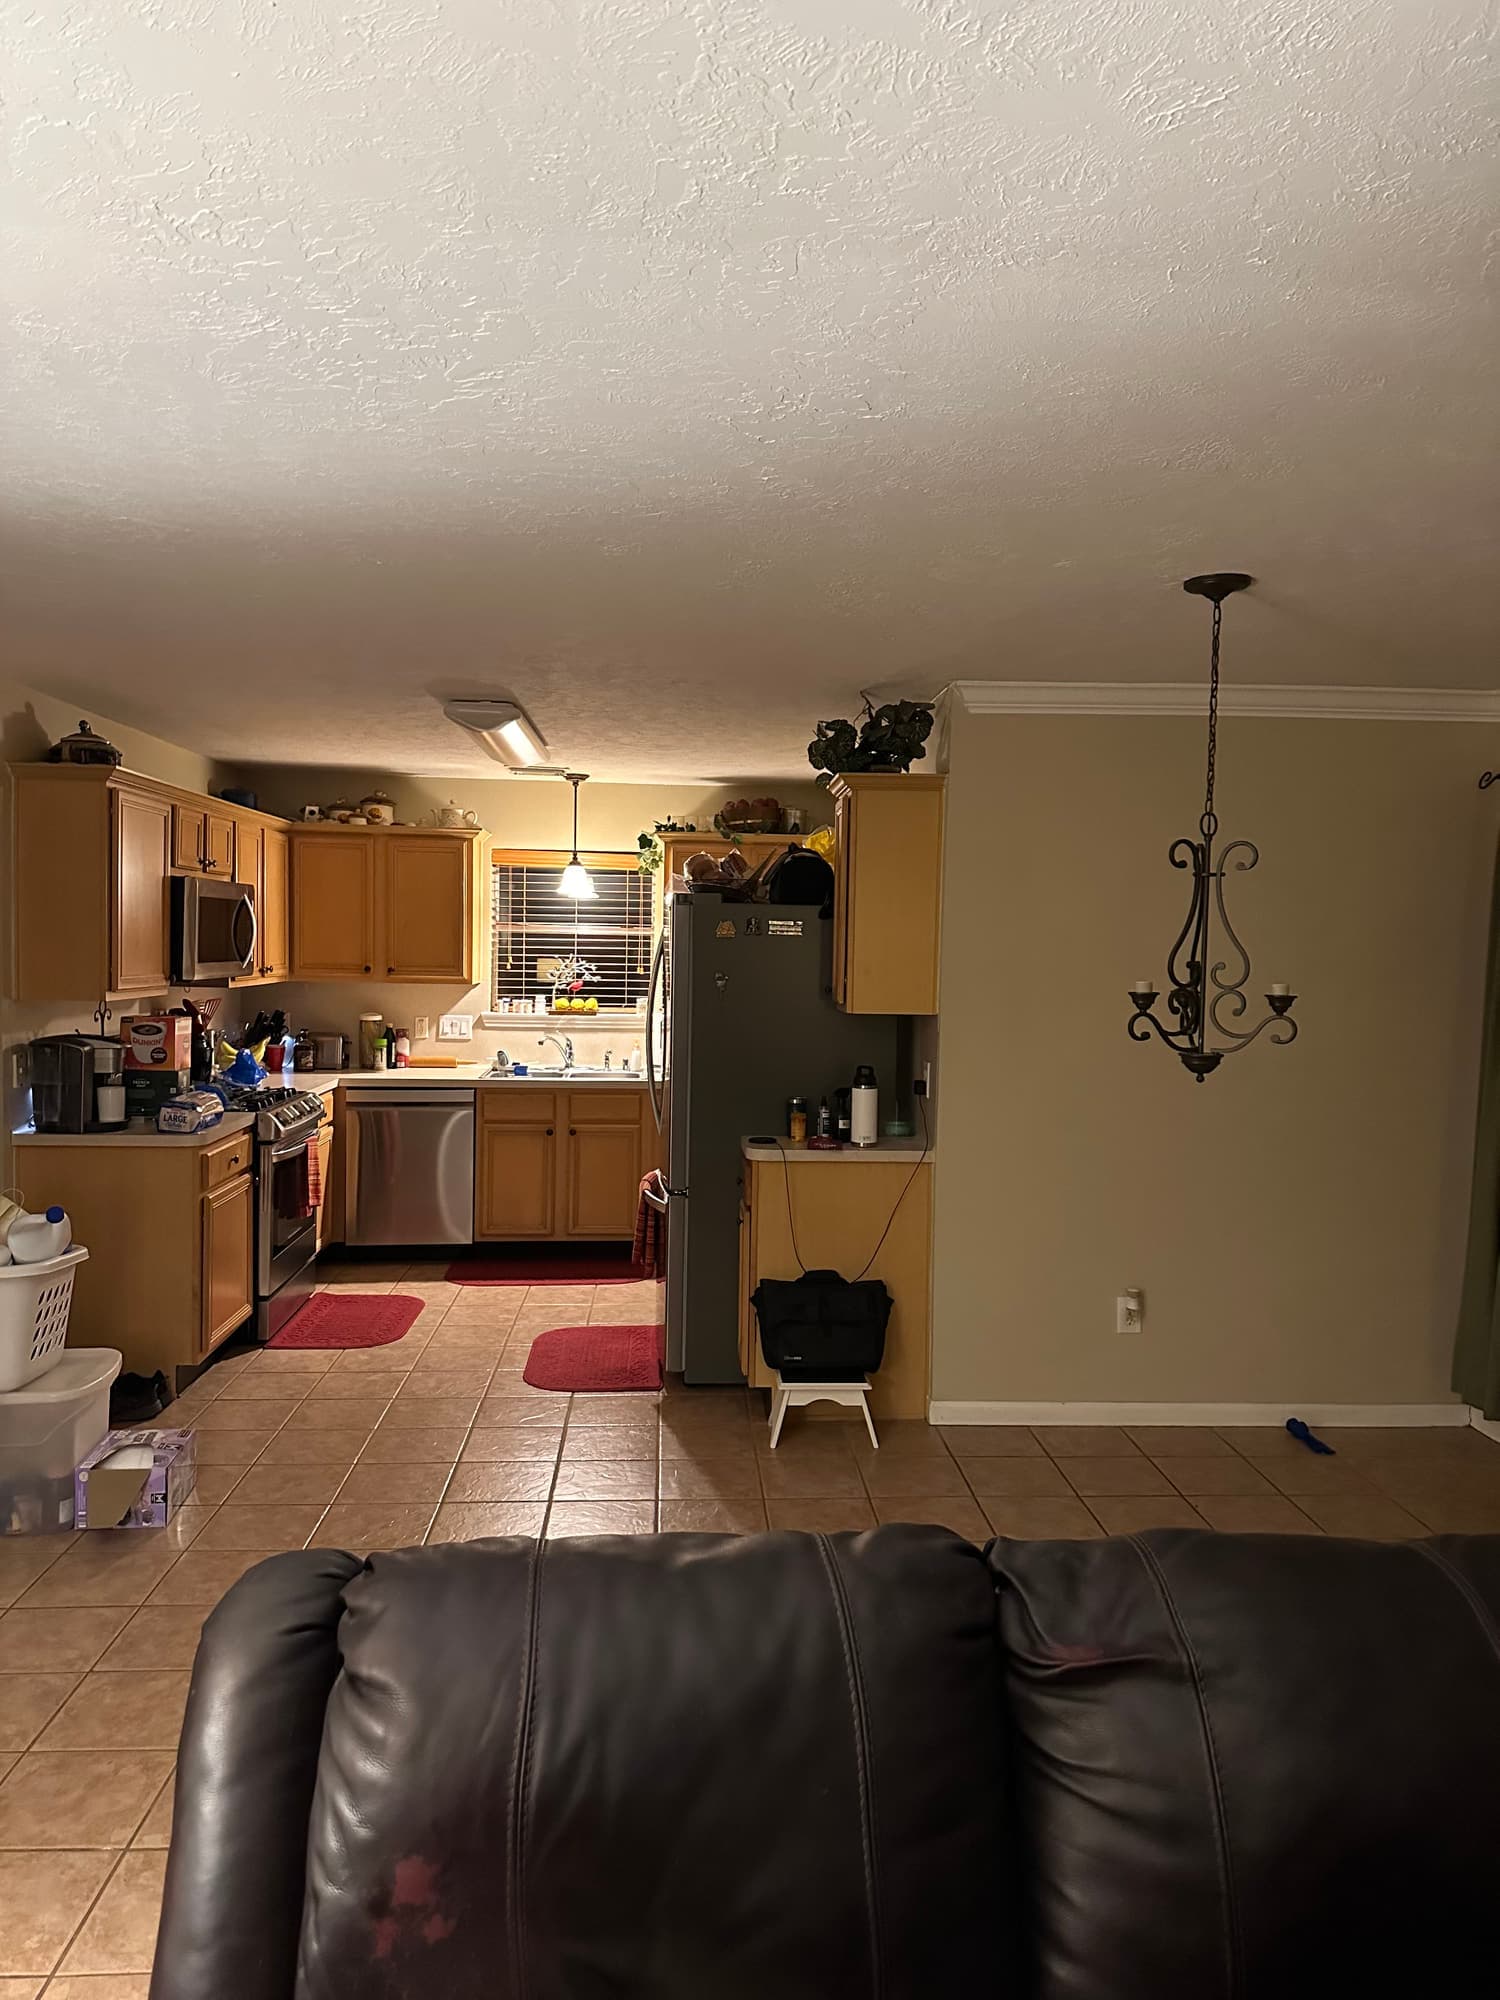
A typical starting point: honey-oak boxes, tile countertops with grout joints running through the work surface, and a dropped soffit eating the wall above the uppers.
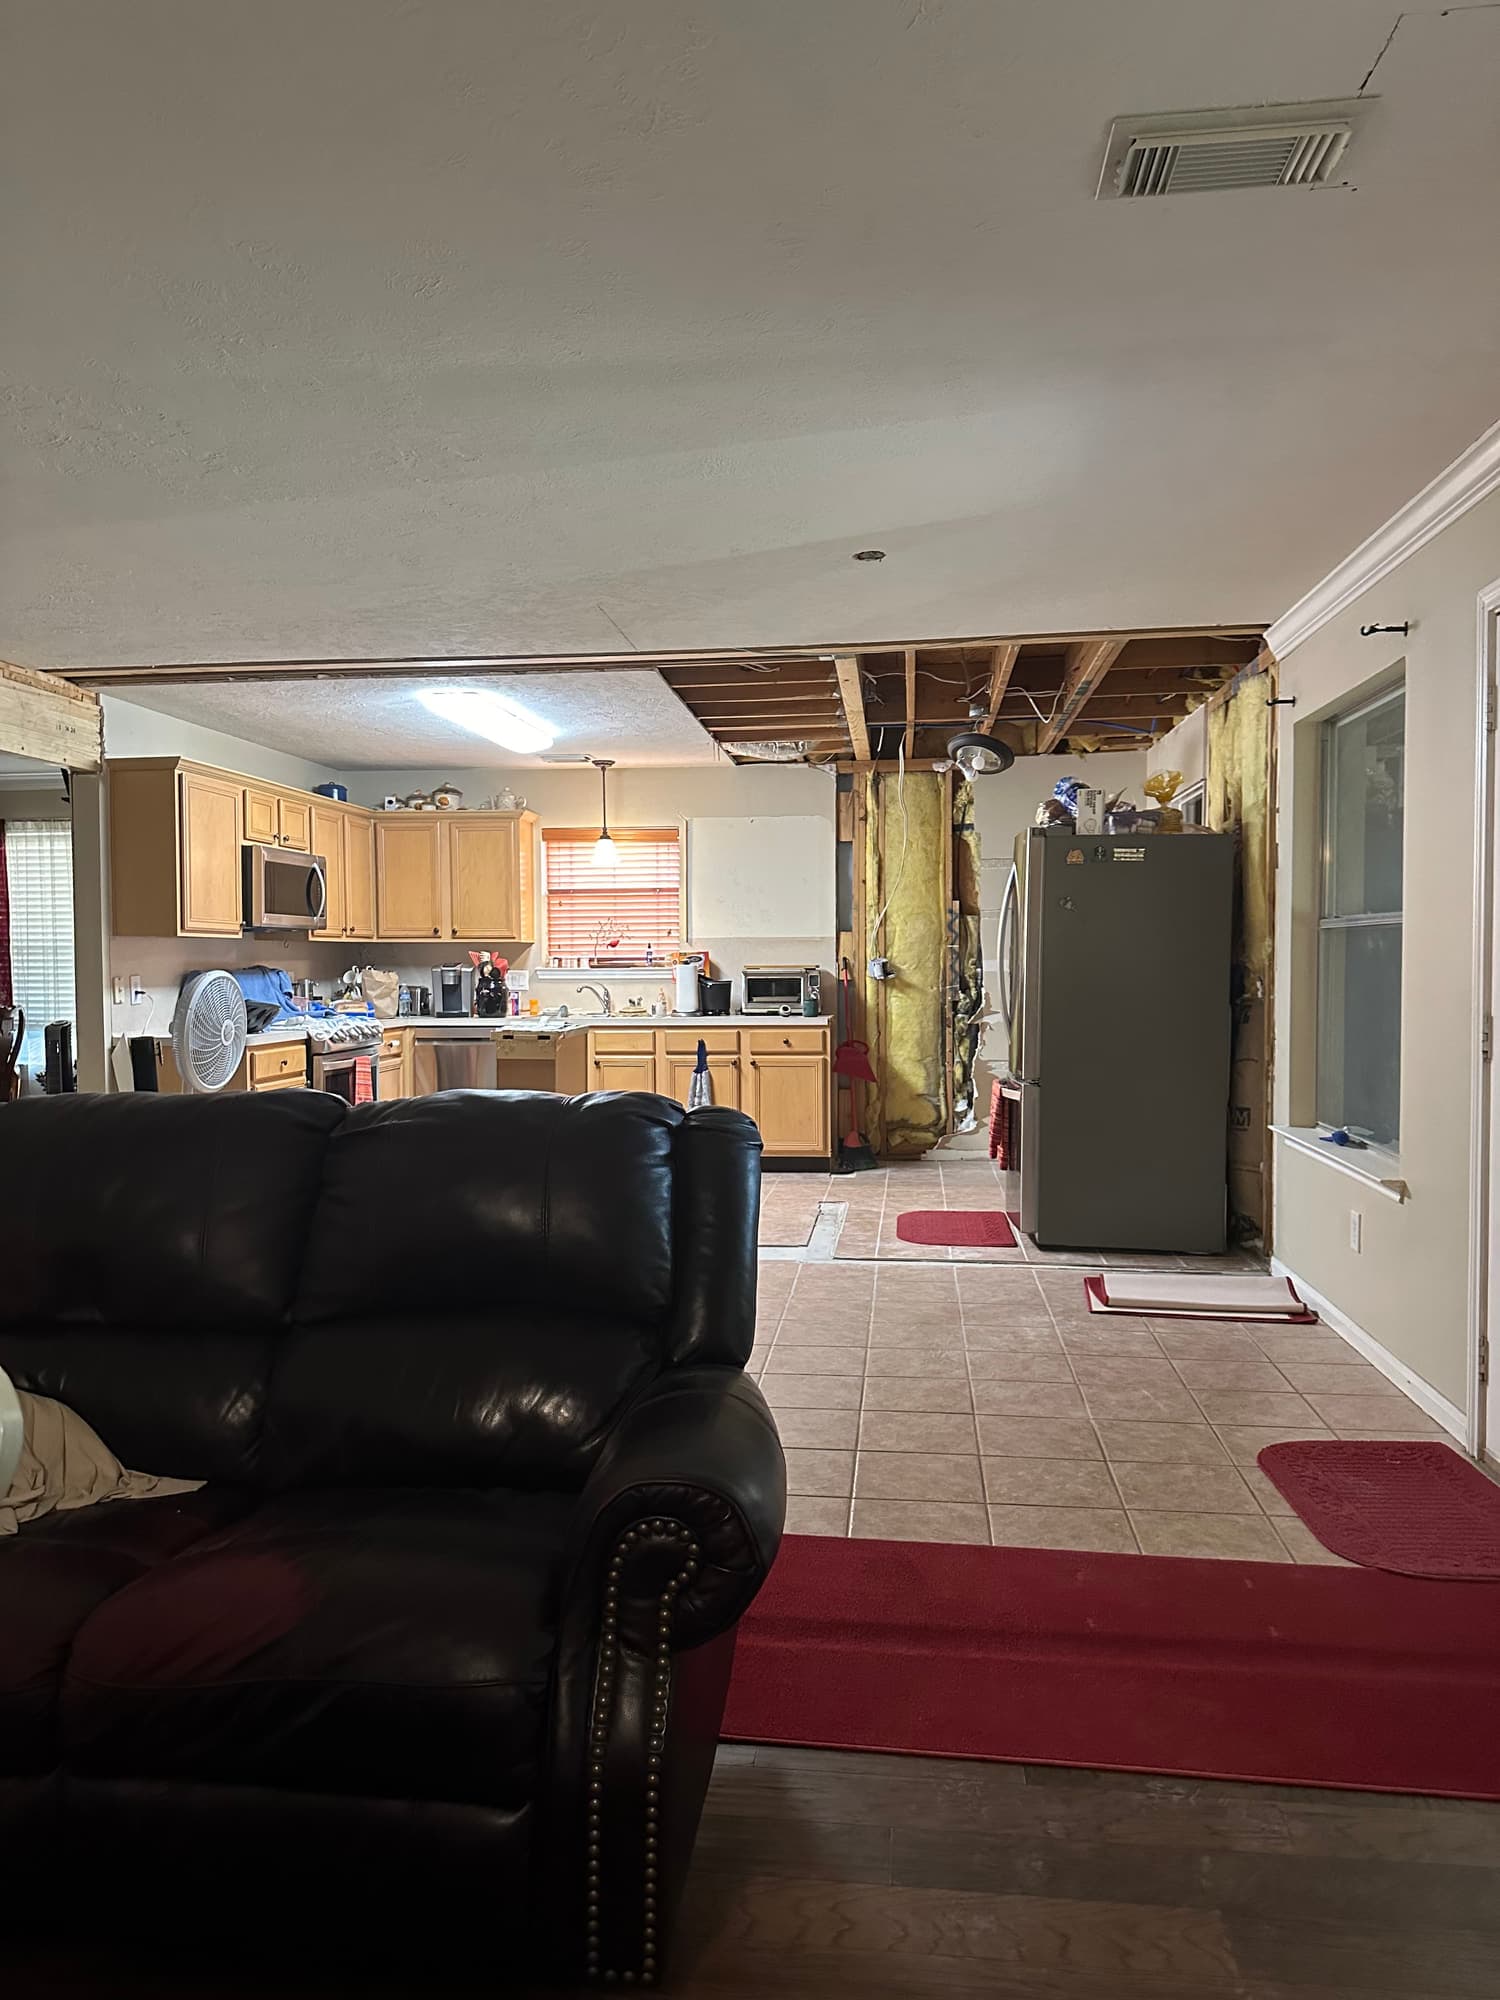
The same kind of soffit removed. Opening the ceiling shows what the soffit was hiding, in this case framing and insulation. Whatever is up there, duct, wiring or can-light housings, has to be rerouted before new uppers can run to the ceiling.
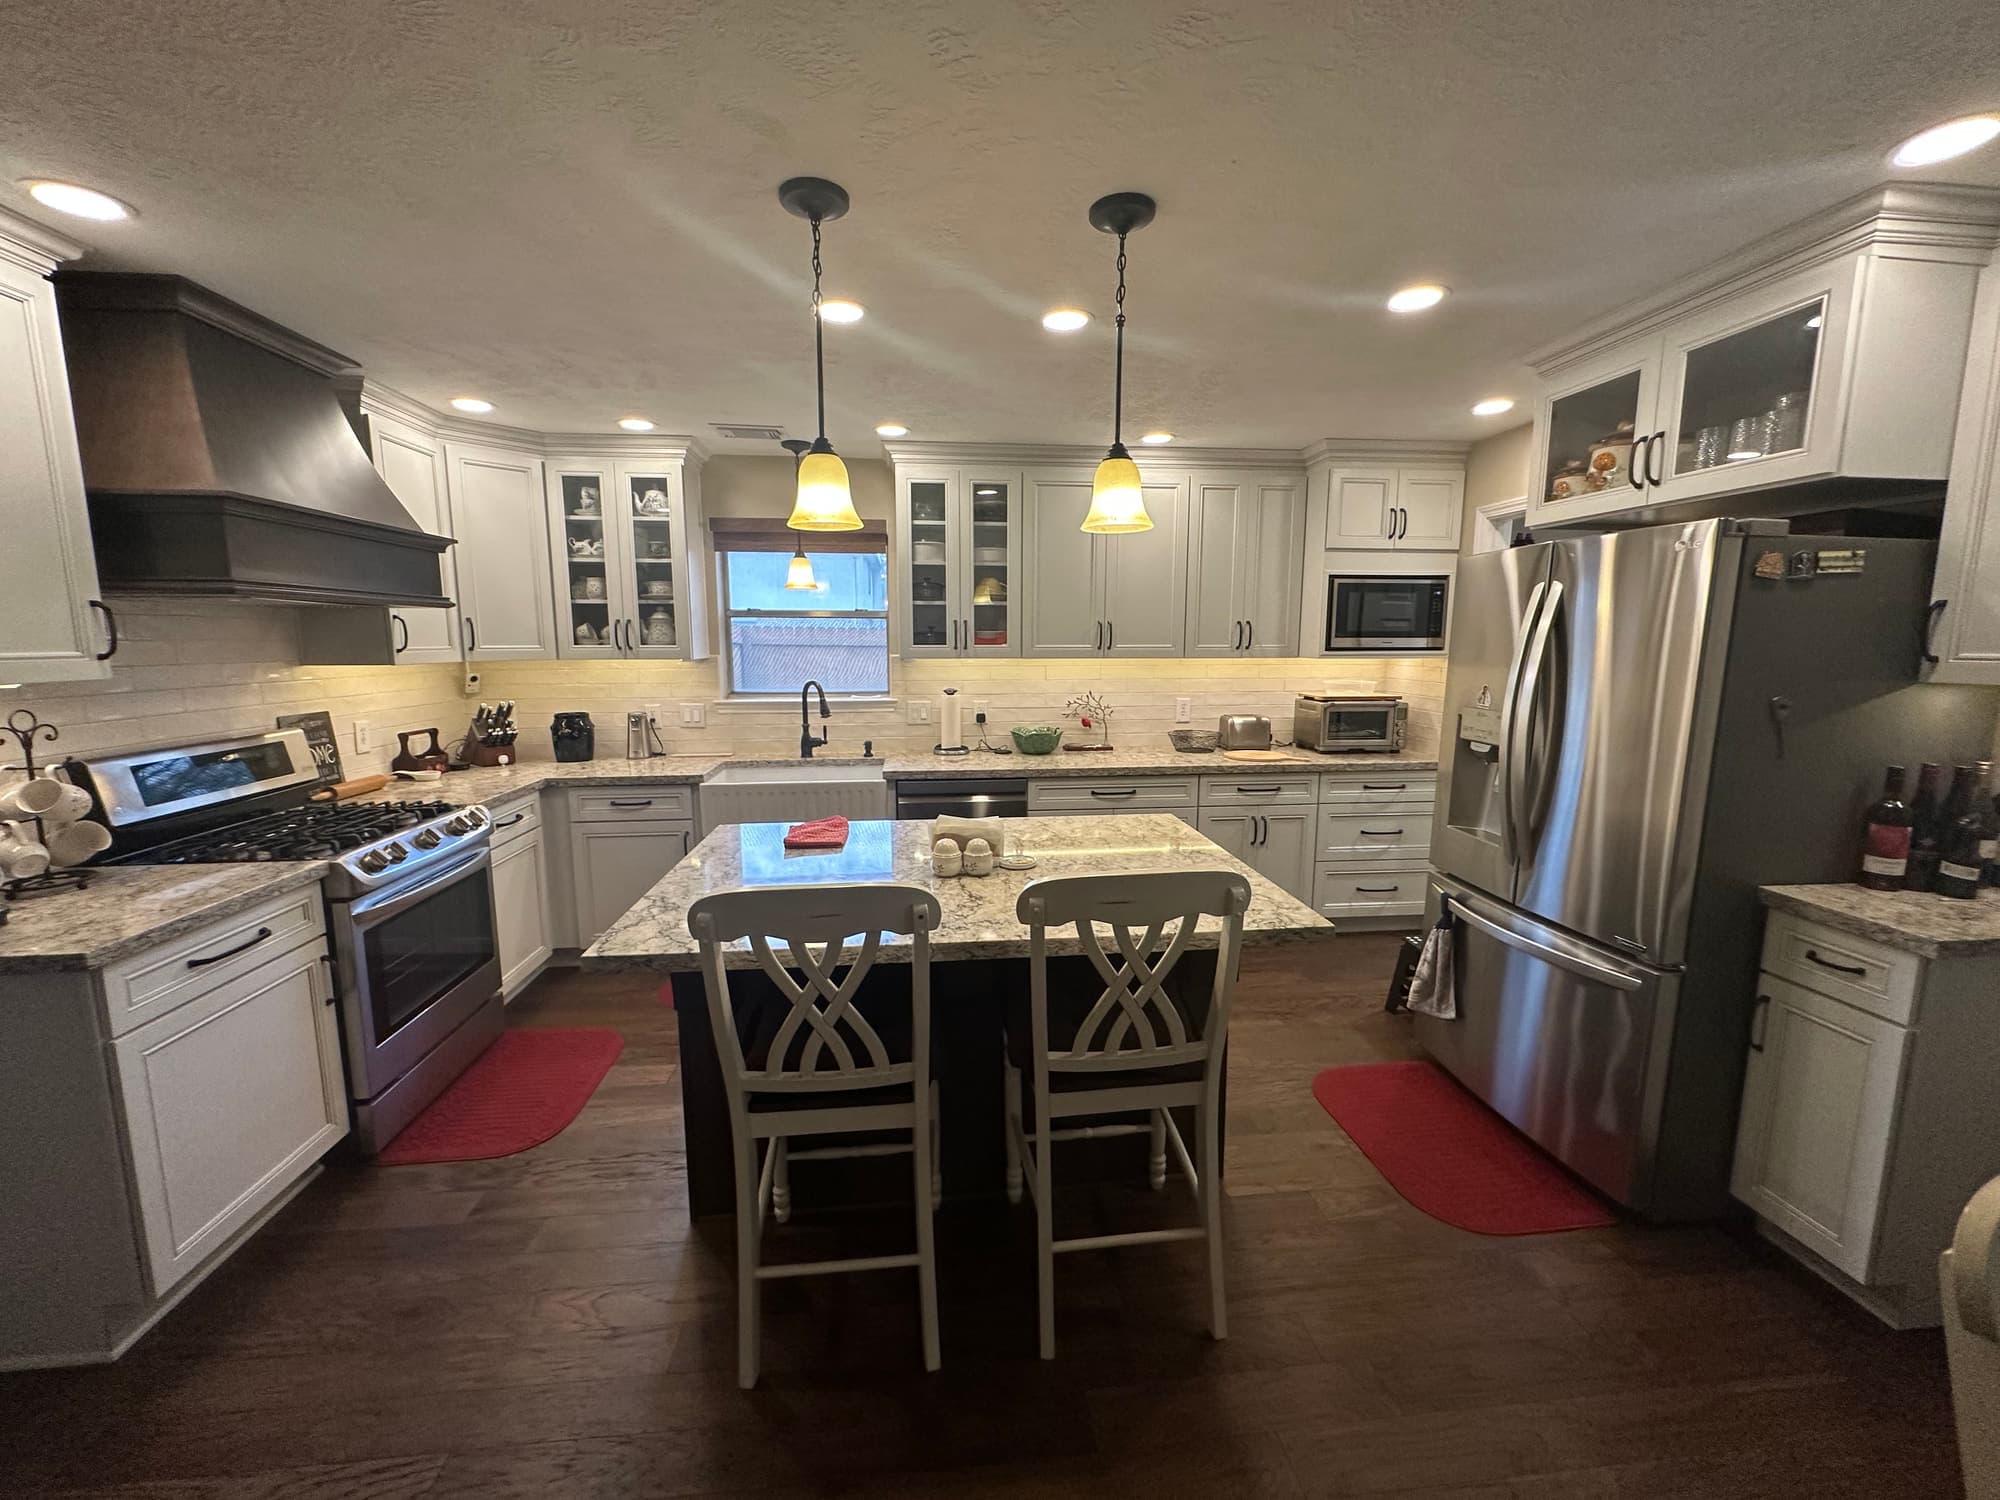
Finished result with a quartz island, apron-front sink and subway backsplash. An island with a sink is only possible where a drain and vent can physically and code-legally reach it, which on a slab house is decided before anything is ordered.
What the job includes
Scope, in the order it happens
01
Demolition, dust control and protection
Cabinets, counters, flooring, backsplash and soffits come out, with the kitchen sealed off from the rest of the house with plastic and a zipper door and the walking path protected. Appliances that are being reused get pulled and stored, not shoved into a corner. Debris is hauled out as we go rather than piled in the driveway for the length of the job.
02
Layout changes and structural openings
Removing a wall between the kitchen and living area means identifying whether it carries load, shoring the ceiling with temporary posts, and installing a properly sized header before anything permanent is framed. Plumbing, HVAC and electrical inside that wall have to be rerouted first. This overlaps with our wall removal and open concept work, and it is the part of a kitchen most likely to require a permit.
03
Plumbing and electrical rough-in
New sink and dishwasher supply and drain lines, gas or electrical for the range, dedicated circuits, added countertop receptacles, under-cabinet lighting wiring and recessed can layout all get roughed in while the walls are open. Hood ducting is run to the exterior with rigid metal duct wherever the framing allows it. Rough-in is the last easy chance to change the layout.
04
Cabinet installation
We find the high point of the floor, snap a level line off it, and hang uppers first so we are not reaching over base cabinets. Boxes are shimmed, clamped together, screwed to studs through the hanging rail and scribed to out-of-square walls with fillers instead of being forced into place. Doors and drawers are then adjusted for consistent reveals, which is what makes a set of cabinets read as level even when the house is not.
05
Countertops and sink
Countertops are digitally templated after the cabinets are set, not before, so the fabricated slab matches the room as built. We coordinate seam placement, overhang and any support needed at an island or bar, and confirm cutouts for the sink, faucet, soap dispenser and cooktop before the slab is cut. Sink, faucet and disposal are set and connected after the top is installed.
06
Backsplash and floor tile
Backsplash tile is set on a flat, sound substrate with the layout planned so cut tiles land at the ends and outlets fall on a joint where possible, with an outside corner finished by a Schluter-style edge profile or a mitred tile edge. Floor tile is set over cement board or an uncoupling membrane, back-buttered on large formats, and grouted with sanded or unsanded grout depending on joint width. This is the same tile installation work we do in bathroom remodeling, and the same rules apply.
07
Drywall, trim and paint
Soffit removal and wall changes leave drywall work behind, which we patch, tape and finish to match the surrounding texture rather than leaving a visible rectangle. Trim carpentry covers base, casing, crown at the cabinet tops and the island panel work. Interior painting finishes walls, ceiling and trim, with primer over all new drywall so the sheen matches.
Materials and specification
What it is actually built from
Specifications vary with the house and what we find once it is open. This is the standard we work to unless there is a reason not to — and if there is, we will tell you what it is before we change it.
Before: honey-oak boxes, tiled counters and a closed-in galley layout.
Cabinet boxes and drawer hardware
3/4 in. plywood boxes with a 3/4 in. hanging rail, or 5/8 in. furniture board on lower-cost lines; full-extension undermount soft-close slides commonly rated 75 to 100 lb; six-way adjustable concealed hinges
Cabinet installation tolerance
Set off the high point of the floor and shimmed to within about 1/8 in. of level over an 8 ft run; fastened to studs with 2-1/2 in. cabinet screws through the rail; scribed fillers at walls rather than forced boxes
Countertops
3 cm (about 1-1/4 in.) quartz, granite or sintered slab set directly on the boxes, or 2 cm laminated to a 1-1/2 in. mitred edge; templated after cabinet install; islands over about 10 in. of overhang get steel or corbel support
Floor tile assembly
1/2 in. cement board or an uncoupling membrane over the substrate; large-format porcelain back-buttered in a medium-bed mortar; 1/8 to 3/16 in. joints, with offset patterns held to a third rather than a half on long planks
Grout and sealants
Sanded grout at joints 1/8 in. and wider, unsanded below that, epoxy grout where staining is a concern; 100 percent silicone rather than grout at every change of plane, including the countertop-to-backsplash joint
Backsplash substrate
1/2 in. drywall on dry walls, 1/2 in. cement board where water is expected, both flat and sound before tile; polymer-modified thin-set rather than mastic behind a range or anywhere heat and moisture are involved
Drywall and ceilings
1/2 in. board on walls, 5/8 in. Type X where required, 1/2 in. sag-resistant on ceiling framing at 24 in. on center; Level 4 finish as standard, Level 5 under gloss paint or strong raking light
Kitchen electrical and venting
12 AWG on 20 amp small-appliance circuits for countertop receptacles with GFCI protection, plus dedicated circuits for dishwasher, disposal and built-in microwave; range hood vented through 6 in. or larger rigid metal duct with an exterior damper
Local conditions
What changes because this is Houston
Gulf Coast clay, humidity and a storm season are not background detail. They decide how this work gets built.
Slab movement on expansive clay
Greater Houston sits on shrink-swell clay, and seasonal moisture swings move slabs, and it is common to find the floor out of level from one end of a long cabinet run to the other. We shoot the floor with a laser before cabinets go in, find the high point, and set every box off that line so the countertop lands flat. Ignoring this is how you get a counter that rocks, a dishwasher that will not slide in, and toe kicks with a visible taper.
Post-tension slabs and moving the sink
Many Houston-area homes are built on post-tension slabs, and the tendons inside cannot be cut or cored without locating them first. That directly limits how far a sink, dishwasher drain or island can move from its existing rough-in. Where relocation is not practical, the usual alternatives are keeping the drain where it is and rebuilding the layout around it, or moving the fixture to a wall where the existing drain and vent can already be reached.
Humidity, storm season and material acclimation
Long humid summers and a June through November storm season affect both materials and schedule. Cabinets, hardwood and trim should sit in the conditioned house before installation so they move before they are fastened, not after, which means keeping the air conditioning running through demolition and finish work even with the kitchen torn open. Slab-on-grade floors also need a moisture check before any wood or glue-down product goes down.
What opens up behind a Houston kitchen wall
Termites, including Formosan, and years of small plumbing leaks are common finds once a sink base or a soffit comes off. Rot at a bottom plate, a chewed stud or corroded galvanized supply lines has to be repaired before anything is closed back up, and that work is not visible in the original estimate. Nothing gets closed up until you have seen the damage yourself and agreed to the repair.
Permits, deed restrictions and HOA covenants
Houston has no conventional zoning, so what governs a project is usually the deed restrictions on the lot and any HOA covenants, plus the permit rules of whoever has jurisdiction. Inside city limits, permits go through the Houston Permitting Center; in unincorporated Harris County, through the county; Fort Bend, Montgomery, Brazoria, Galveston, Waller and the incorporated suburbs each run their own offices. Electrical, plumbing and structural work in a kitchen is the part that typically triggers a permit, while a cosmetic refresh often does not.
How it runs
From the first call to the last walkthrough
1
1. Walkthrough and measurement
We come to the house, measure the room, look at what is behind the sink base and above the ceiling where possible, and talk through what you want changed versus what you want kept. Estimates are free. If the plan involves moving plumbing or removing a wall, we say so at this visit rather than after demolition.
2
2. Layout, selections and ordering
Cabinet layout gets finalized against real measurements, including appliance specs, since a range width or a counter-depth refrigerator changes the filler and the run. You make selections on cabinet door style and finish, countertop material, tile and paint. Cabinets and slabs are ordered at this stage because their lead time, not the labor, usually sets the start date.
3
3. Demolition and discovery
We protect the floors and the path in and out, seal the kitchen off with plastic and a zipper door, and take out cabinets, counters, flooring and soffits. This is when the surprises appear: rot at a sink base, termite damage, undersized wiring, a wall that turns out to be carrying load. We stop, show you what is there, and price the repair before covering it.
4
4. Framing, rough-in and inspection
Any wall removal gets temporary shoring and a properly sized header before the studs come out. Plumbing and electrical rough-in follows, including new circuits, hood ducting to the exterior and any relocated drains. Where the jurisdiction requires it, this work is inspected before insulation and drywall close it in.
5
5. Drywall, floor, cabinets and countertops
Drywall goes in, gets finished and primed, and the floor is laid so cabinets can sit on top of it. Cabinets are shimmed and scribed off the high point of the floor, screwed to studs, and the runs are checked for level and plane. The countertop fabricator templates on the set cabinets, and the slab returns for install a week or two later, followed by the sink, faucet and appliance hookups.
6
6. Backsplash, paint, trim and walkthrough
Backsplash tile is set and grouted, then trim carpentry, caulk and interior painting finish the room. We walk the kitchen with you and build a punch list: drawer alignment, door reveals, touch-up paint, caulk lines, any grout that needs attention. Those items get closed out before the job is called done.
Before: honey-oak boxes, tiled counters and a closed-in galley layout.
Demo day: soffits down, ceiling opened, wiring and insulation exposed for inspection.
After: a custom wood hood, a seated island and hardwood running through to the dining room.
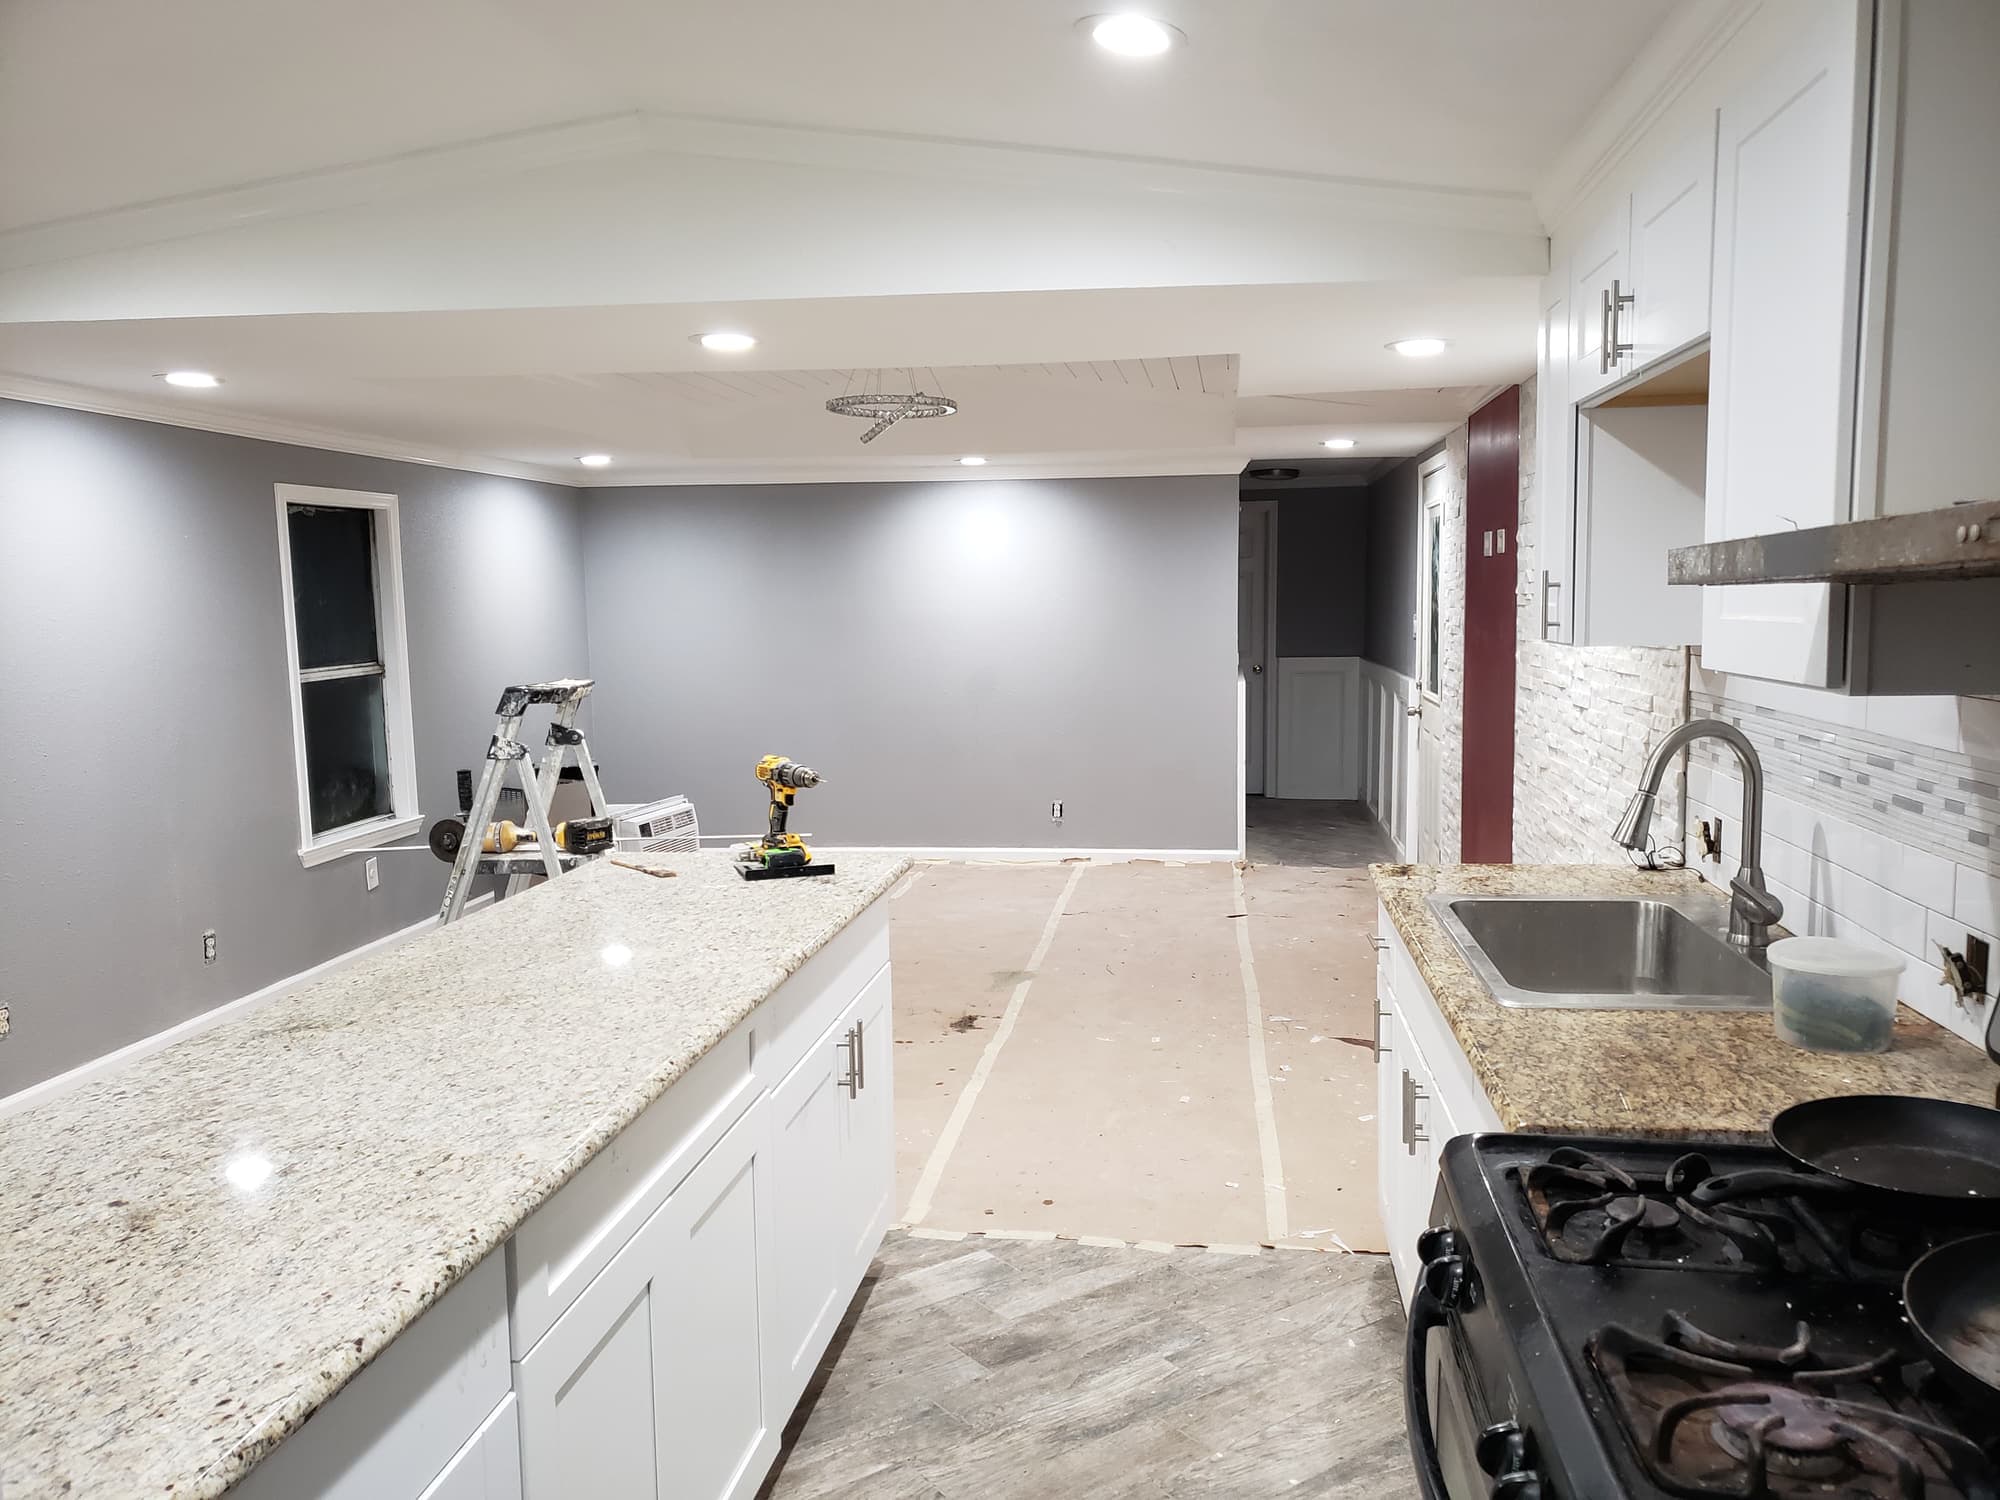
White shaker boxes hung, granite set, stone backsplash in — floor protection still down.
Questions
Kitchen Remodeling, answered
How long does a full kitchen remodel take?
A kitchen with new cabinets, countertops, tile and paint is a job measured in weeks of on-site work, not days. The two items that most often set the schedule are cabinet lead time, which is decided the day you place the order, and countertop fabrication, which is set by the fabricator's shop schedule and runs from template day to install day because the slab cannot be templated until the cabinets are set and level. Structural changes, inspections and any rot or termite repair found during demolition add time on top of that.
Can I move the sink or add an island with a sink?
Sometimes, but the slab decides. If the house is on a post-tension slab, the tendons have to be located before anyone cuts or cores concrete, and if a cable runs where the new drain needs to go, the drain does not go there. When relocation is not workable we either build the layout around the existing rough-in, or locate the tendons and cut and re-pour a section of slab for the new drain, which adds framing, concrete and schedule to the job.
Do I need a permit for a kitchen remodel?
It depends on the scope and on who has jurisdiction over your address. Replacing cabinets and counters in the same footprint is usually cosmetic, while new circuits, moved plumbing, and removing a wall are the items that typically require a permit and inspection. Inside the city, permits are issued by the Houston Permitting Center; in unincorporated Harris County the county handles it, and the surrounding counties and incorporated suburbs each run their own permit offices, so the process and the required drawings vary by address.
Should the new floor run under the cabinets or stop at the toe kick?
Running the floor wall to wall and setting cabinets on top is the cleaner method, and it is what we prefer when the flooring is going in as part of the same project. It keeps the dishwasher opening at full height, avoids a filler strip at the toe kick, and lets a future appliance slide in and out without fighting a lip of tile. Stopping at the toe kick saves material but locks you into that appliance height, so it makes sense mainly when the existing cabinets are staying. This overlaps with our flooring installation and tile installation work, and we plan the two trades together.
Can I stay in the house while the kitchen is being remodeled?
Usually yes, with some planning. We seal the opening with plastic and zipper doors, protect the path in and out, and keep the water off only for the short windows when the plumbing is actually being worked on. Plan a temporary kitchen somewhere else in the house with the refrigerator, a microwave and a coffee maker, because the range and sink are out of service for most of the job.
What actually drives the price of a kitchen remodel?
Layout changes cost more than finishes. Moving plumbing, adding circuits, ducting a hood to the exterior, or removing a load-bearing wall each pull in framing, rough-in and inspection work that a same-footprint kitchen never touches. After that, the biggest swings are cabinet construction and door style, countertop material and edge detail, and tile size and pattern, since large-format and herringbone layouts take far longer to set than a straight running bond.
Call and talk to someone who has been doing this for 15+ years. We will look at the space, tell you what the work actually involves, and put a number on it — at no cost.